 Alright, so I recently had to attempt a fix with a Microsoft Surface Pro 4 cooking itself in it’s own juices. This was for a client repair job and will only fix the issue via software. The overheating problem is a hardware issue and cannot be fixed entirely by software, but with this guide, you can at least tackle the problem partially.
What we’re going to do is knock down the CPU’s frequency speed so that it doesn’t heat up as much.
Before you start, I strongly recommend you download and install HWMonitor or HWInfo64. Also get the Unigine Valley Benchmark which will place a good stressful workload on the CPU as well as the GPU. However I strongly do not recommend using Prime95 or any other “burn-in” tools on tablet devices in this case.
Leave HWInfo64’s Sensors Window or HWMonitor open during your diagnostics. This makes it much easier to know how hot your poor Surface Pro 4 is getting.
A little background on the overheating issue
From what I gather, the Surface Pro 4 has a big design flaw that leads to heat to build up, eventually causing the screen to start ghosting and the back to get very hot. You may also notice stuttering and very poor performance or battery life due to the heat affecting the processor’s clock speed, etc.
You can tell it’s overheating when the back of the device is very hot, as well as the screen glass being a little too warm to touch.
Google “surface pro 4 overheating issue” or “surface pro 4 screen ghosting” and you’ll find a lot of angry/disappointed/grumpy people complaining about it. And trying to replace the thermal paste on this tablet is a nightmare – just check out iFixit’s guide for what I mean by a “nightmare”.
Preparing the fix
Firstly, let’s start with the basics. We need to get into the classic control panel. The easiest way of doing that is simply double clicking on “Control Panel” if it’s on the desktop (and it’s not by default), or pressing Windows Key + R and typing “control”, then pressing enter or clicking OK:
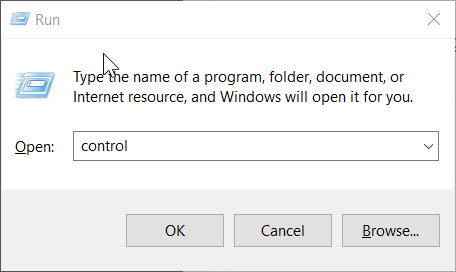
You should be greeted with the following:

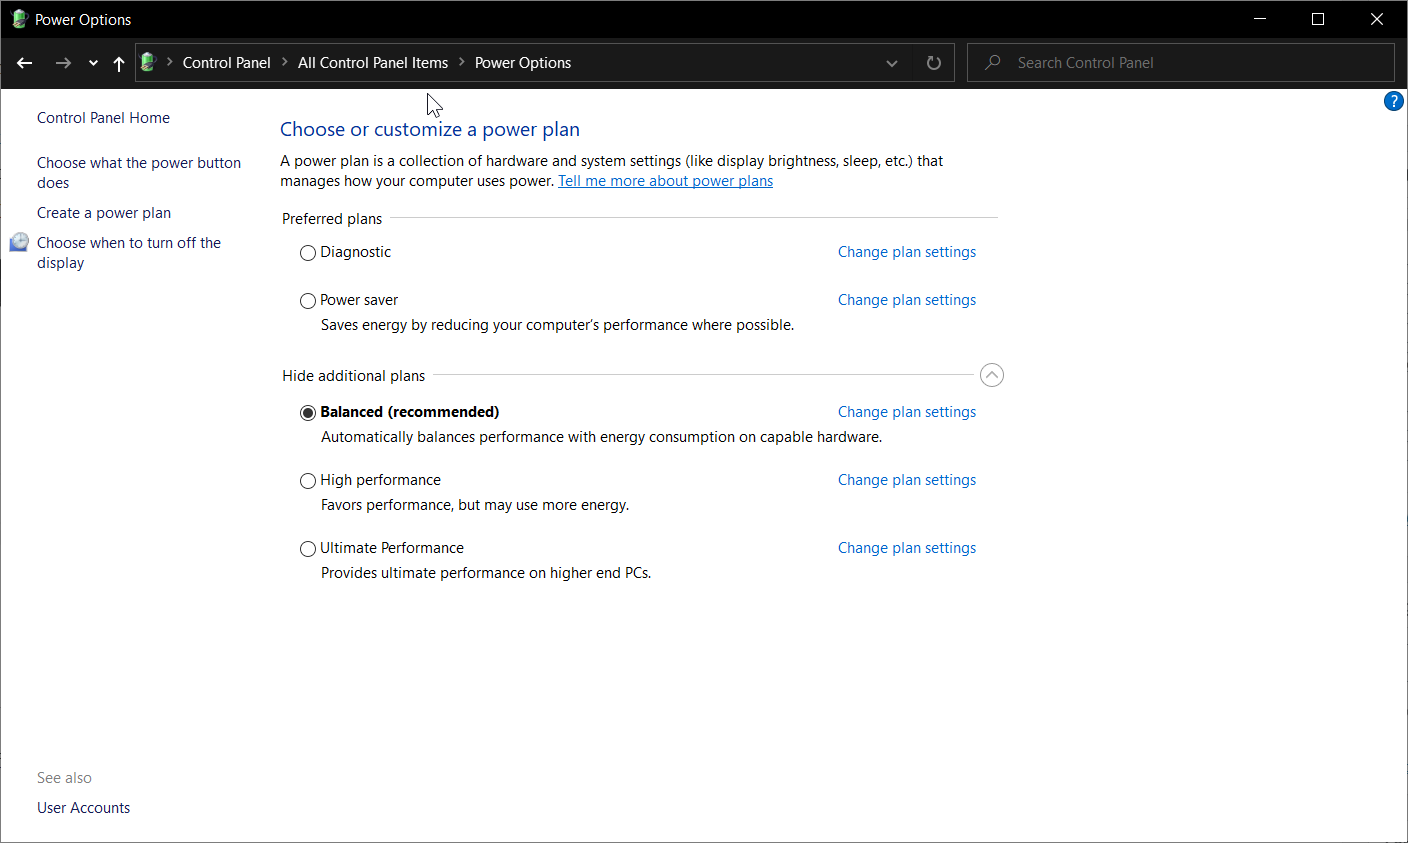
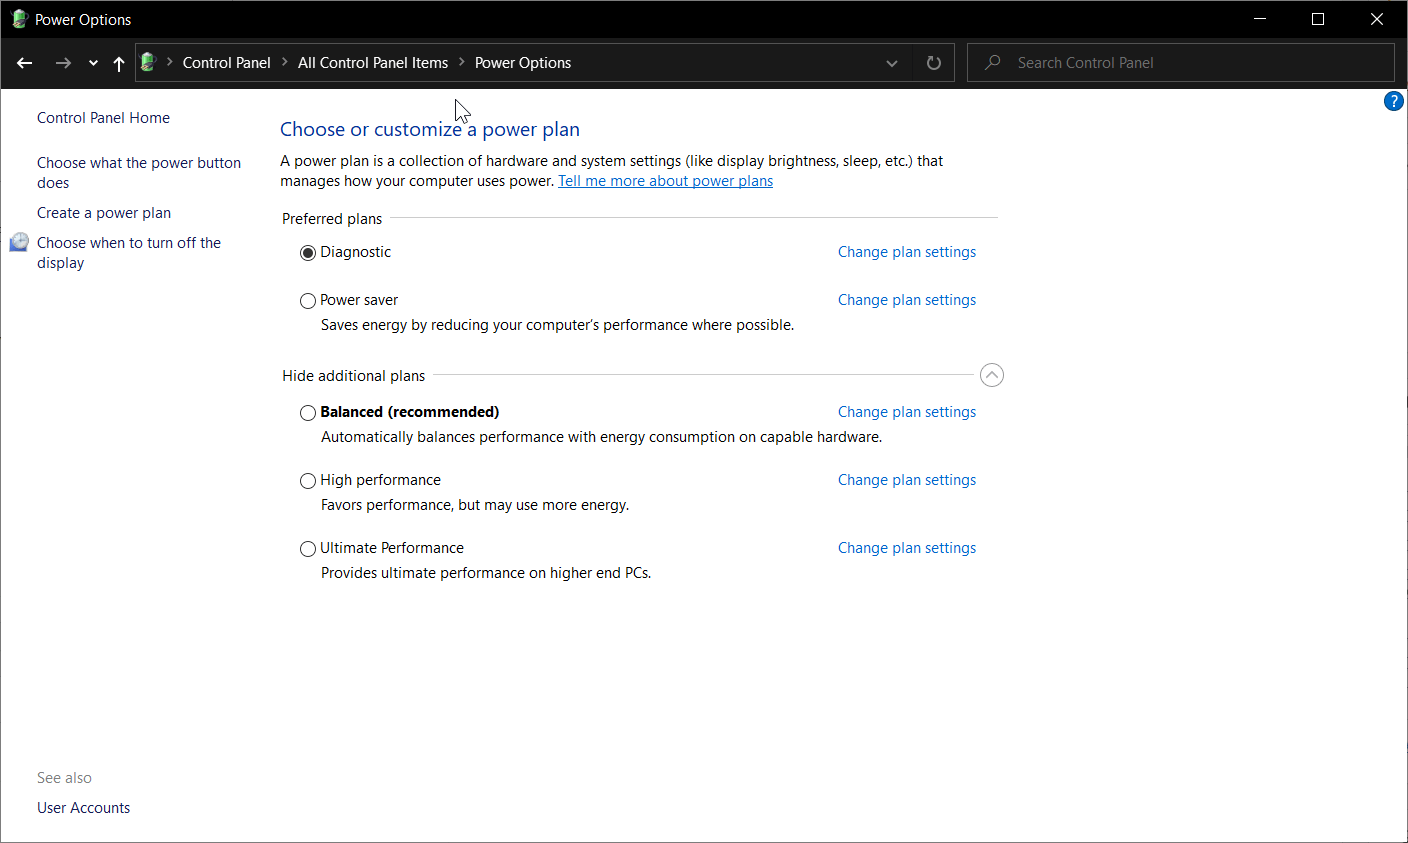
Now click “Power Options” and it’ll bring you to this screen:
On the left, select “Create Power Plan” and choose an existing one as a base. For this example, we’re going to use “Balanced” as a default. I don’t have access to the client’s Surface Pro 4 but if you only have one profile, let’s just roll with that.
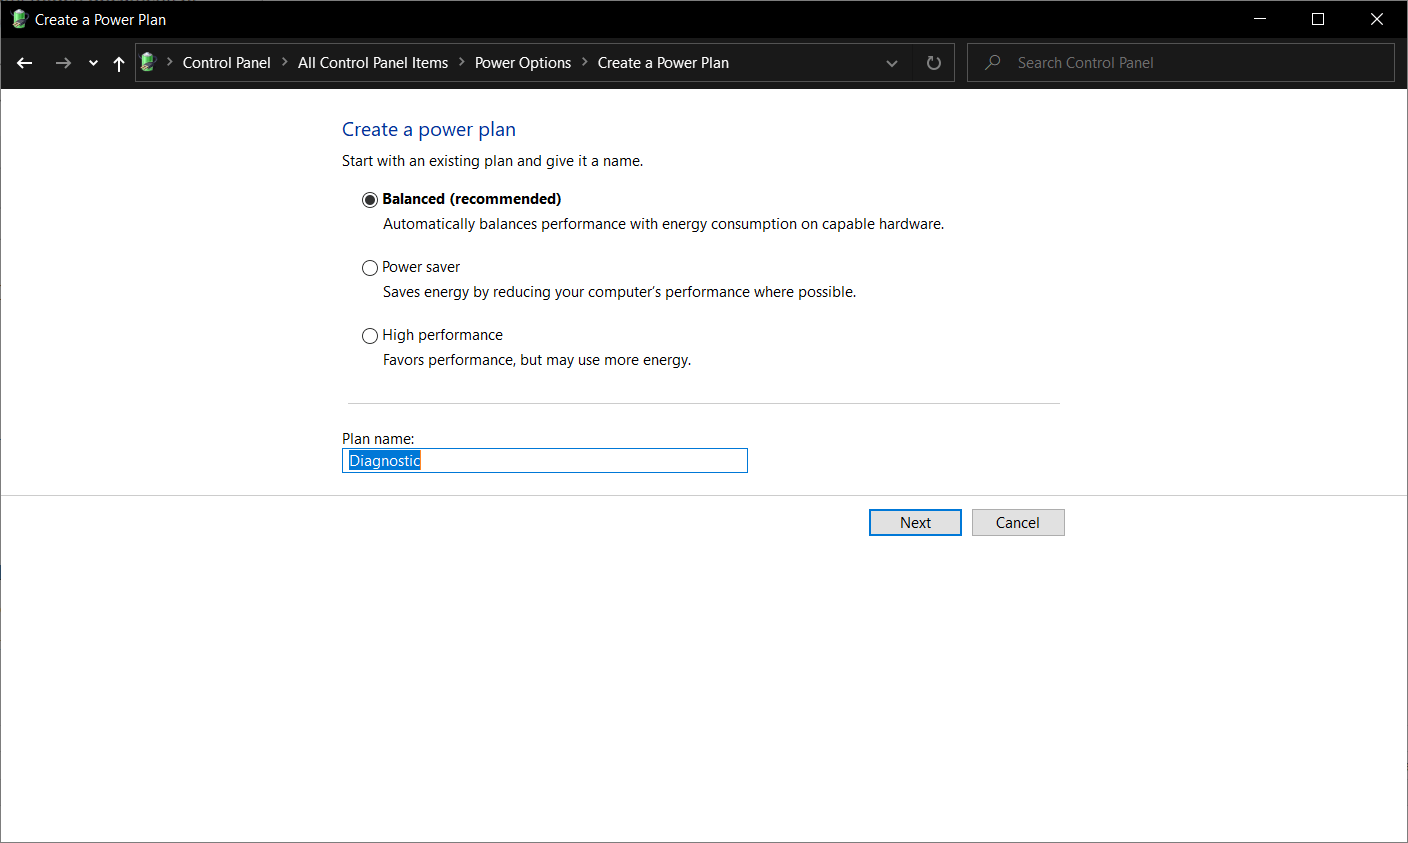
Hit next, and it’ll ask you a bunch of stuff. Choose sane defaults. Keep hitting Next/Create.
You’ll be taken back to the menu like before, but this time you’ll see Diagnostic (or whatever you called it) will be now active.
So far so good.
Administering the (software) fix.
You got this far. Congratulations.
Now this part is a little technical and may even result in you having to do Registry Editing. Yes, that means we might have to do surgery on the beating heart of Windows, which is the Registry.
Now I’m not going to go out on a limb and say that you should never touch the registry and blah blah blah because those others websites like to build fear in the reader, but please do keep a backup. Backup your important shit – documents, etc.
Don’t sue me if the registry modification doesn’t work – while I tested on a client’s Surface Pro 4, region differences or different versions of Windows 10 might not have the same results.
I know you’re desperate for a fix and that’s why you came here. I’ll try to hold your hand as much as I can through this part, but please don’t bite it off. That’s all.
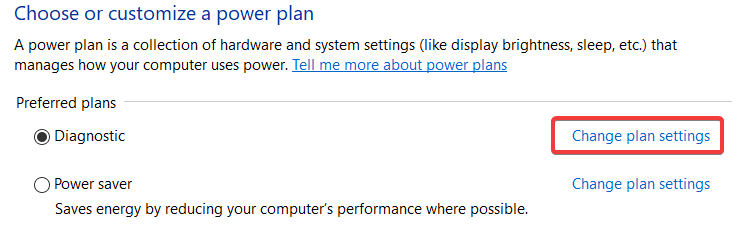
On the same Power Options screen, click the link next to the active profile that says “Change plan settings”. This will bring up another screen, on this screen you want to choose “Change advanced power settings”.
After doing that, you should see something like this:
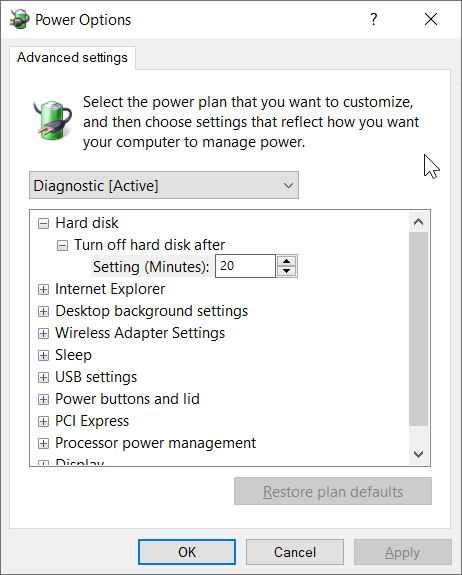
This is where the road forks into two paths.
I will detail both forks. To determine which fork you must take, you need to check the window as shown above and see if you have something called “Processor Power Management”. Do you see this on your window? If yes, continue below. Otherwise, go to fork option 2.
Road Fork 1: Easy Modo
Pay attention to the image above. You should see a few options that we need to modify. They are “Minimum Processor State”, “System Cooling Policy”, and “Maximum Processor State”. Do you have these options?
If yes, continue below. Otherwise, go to fork option 2.
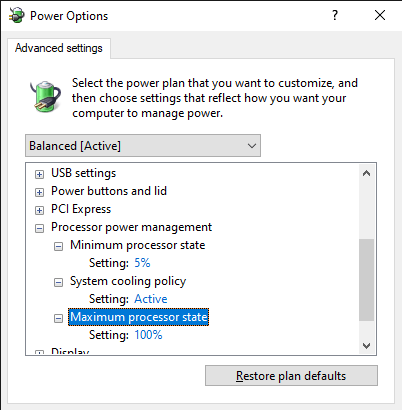
Now, if you have two sets of values for Plugged In and On Battery, then set BOTH to the same value. Do not leave one at 50% and one at 100%. That will defeat the purpose of this whole exercise. Set the shown values to the following values:
- Minimum Power State: 5%
- System Cooling Policy: Passive
This will slow down the processor when it’s getting toasty, rather than trying to keep running at full throttle. I am not sure if the Surface Pro 4 has a fan inside it. Regardless, the CPU should be trying to throttle down when it’s getting too hot. - Maximum Processor State: 50% – 75%.
What this option does is limits your top clock speed. Here’s a better explaination:
If your Surface 4 CPU’s base clock is 2.20Ghz, then we will limit the maximum clock speed to 50% – 75% of that clock speed, which is roughly 1.1Ghz – 1.65Ghz. I found around 65 – 70% the sweet spot between heat production and processing power.
Keep in mind that underclocking your processor, which is what we are doing, is acceptable for general use. You won’t lose too much processing power though, you shouldn’t be using a tablet for hardcore stuff anyway…
In additon, I believe this also stops Intel Turbo Boost which is the CPU’s own boost mode. For example, my clients’ Surface Pro 4 went from 2.20Ghz to around 3Ghz with this enabled. When it was in the boost state the temperatures rapidly rose and the device started overheating.
Once complete, click Apply, then OK. If need be, click “Save Changes” again on the Power Options window. Now you should be taken back to the Power Options window. Make sure the profile in use again, then close Power Options. Reboot your Surface Pro 4.
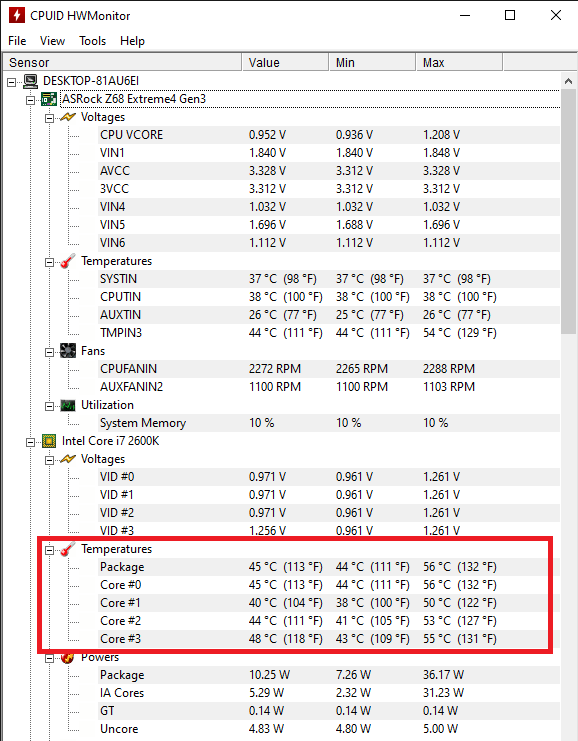
Once logged back in, open HWInfo64 Sensors or HWMonitor again, and check the temperature of the CPU. In the below screenshot I’m using HWMonitor, but I’ve highlighted the data you need to keep an eye on:
Road Fork 2: Hard Modo
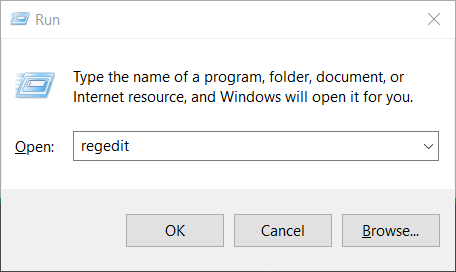
This is the fork I had to take with my client’s Surface Pro 4 since the Surface Integration seemed to take over controls of the power options, and I couldn’t set them. We’ll need to break out the registry editor. Windows Key + R to victory, enter “regedit” and press Enter/click OK.
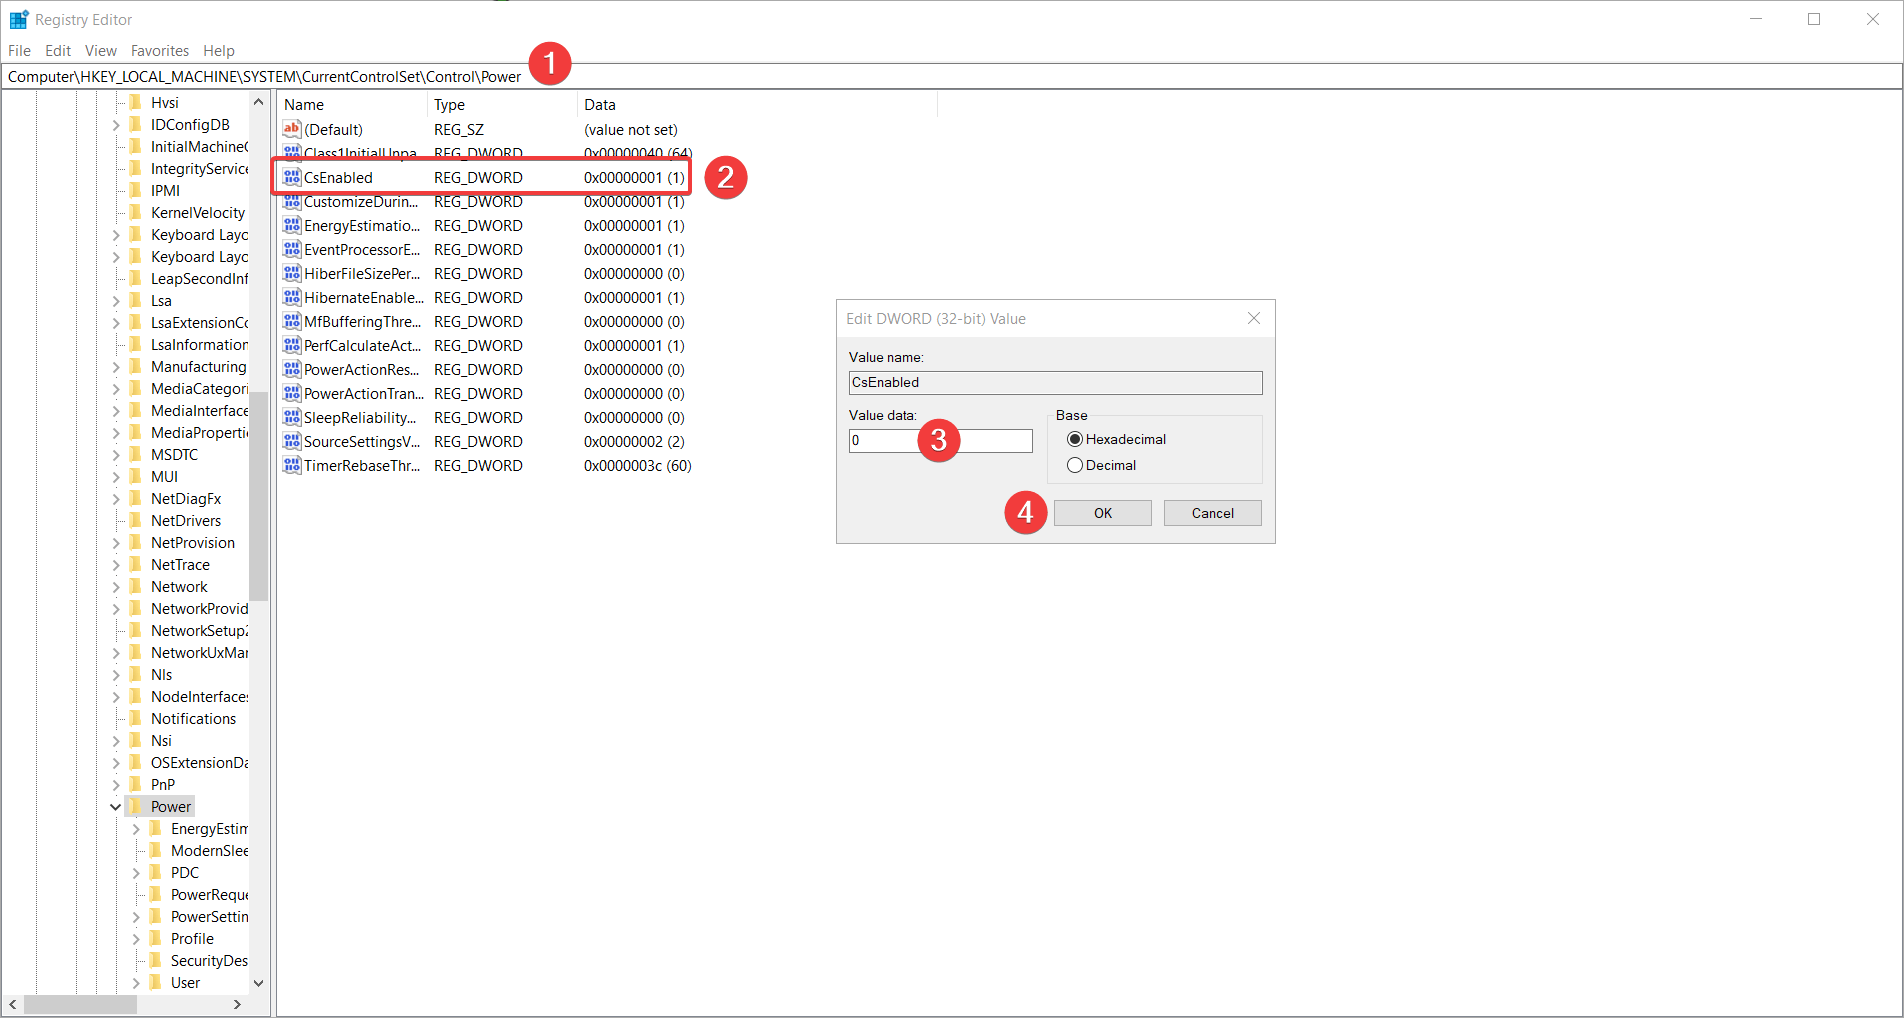
In the top bar, you need to enter:
HKEY_LOCAL_MACHINE\SYSTEM\CurrentControlSet\Control\Power
…and press Enter.
Then double click on a entry called CSEnabled and change the data to 0, then press OK like so:
Close Registry Editor, and restart your computer. Then, follow the steps as listed in fork 1.
Important Note: For whatever reason when I did this on my client’s Surface Pro 4, the Sleep and Hibernate options disappeared. Pressing the power button would shut down the tablet instead of putting it to sleep. Your mileage may vary. Make sure when you’re done, you reset the CSEnabled data value to 1 and then reboot.
Aftermath: Checking if we’re getting toasty again
With everything done, if your tablet is already too hot and ghosting then please shut it down, allow it to cool for 30 minutes to an hour, then boot it back up. We want to run it from a “cold” or “cool” thermal state.
Once logged back into the tablet, boot up the HWMonitor application and watch the temperatures. Check to ensure the power options have stuck.
Boot up the Unigine Valley Benchmark and run it with Basic Settings. Let it run for a while, I ran it windowed at 1920×1080 and also had the temperature sensor window on the screen as well.
In my tests, the tablet would idle around 30 – 35°C, sometimes spiking to mid 40s when various applications were running. As soon as the temperatures peaked around 60 – 75°C the screen would start ghosting. However, after applying the settings it wouldn’t hit 60°C… even after 7 hours of Unigine’s Valley Benchmark on my bench.
If you can leave the tablet idle for about 30 minutes to an hour without any screen flickering or ghosting, then you can pat yourself on the back.
Just keep in mind that you probably should consider getting a replacement as this is a known defect with the Surface Pro 4. But if you can’t afford a replacement right now and/or you want to keep nursing your Surface along, then I hope this guide was of some use to you.
Other interesting thoughts…
If you get into your Surface UEFI Setup Tool via holding SHIFT down while clicking Restart, then choosing Advanced Startup Options and then looking for a UEFI Setup option, there is a option to disable the Hyper Threading part of the CPU. Since tablet Core i5 and i7 are not true quad-core Processors (instead either 2 real cores, 4 hardware threads or 4 cores, 4 threads), turning off Hyper Threading will make you lose two hardware threads.
On an i5 CPU, that would mean you only see 2 Processors, instead of 4 Processors. This might be a interesting venue to help prevent more heat, but you do lose some processing power.
If you found this guide useful and it resolved your issue at least temporarily, please consider a coffee at my Ko-Fi profile. Completely optional, but thank you for your support!
The cs enable option is not on
my regedit
I and using window 10 pro
ver 21H1
Every things is as you show on your indtructiond